Watch Folders

Setting Up Watch Folders
Enable Watch Folders
Open reaConverter, go to Menu → Watch folders and toggle the switch ON. Then click Add new folder to open the setup wizard.

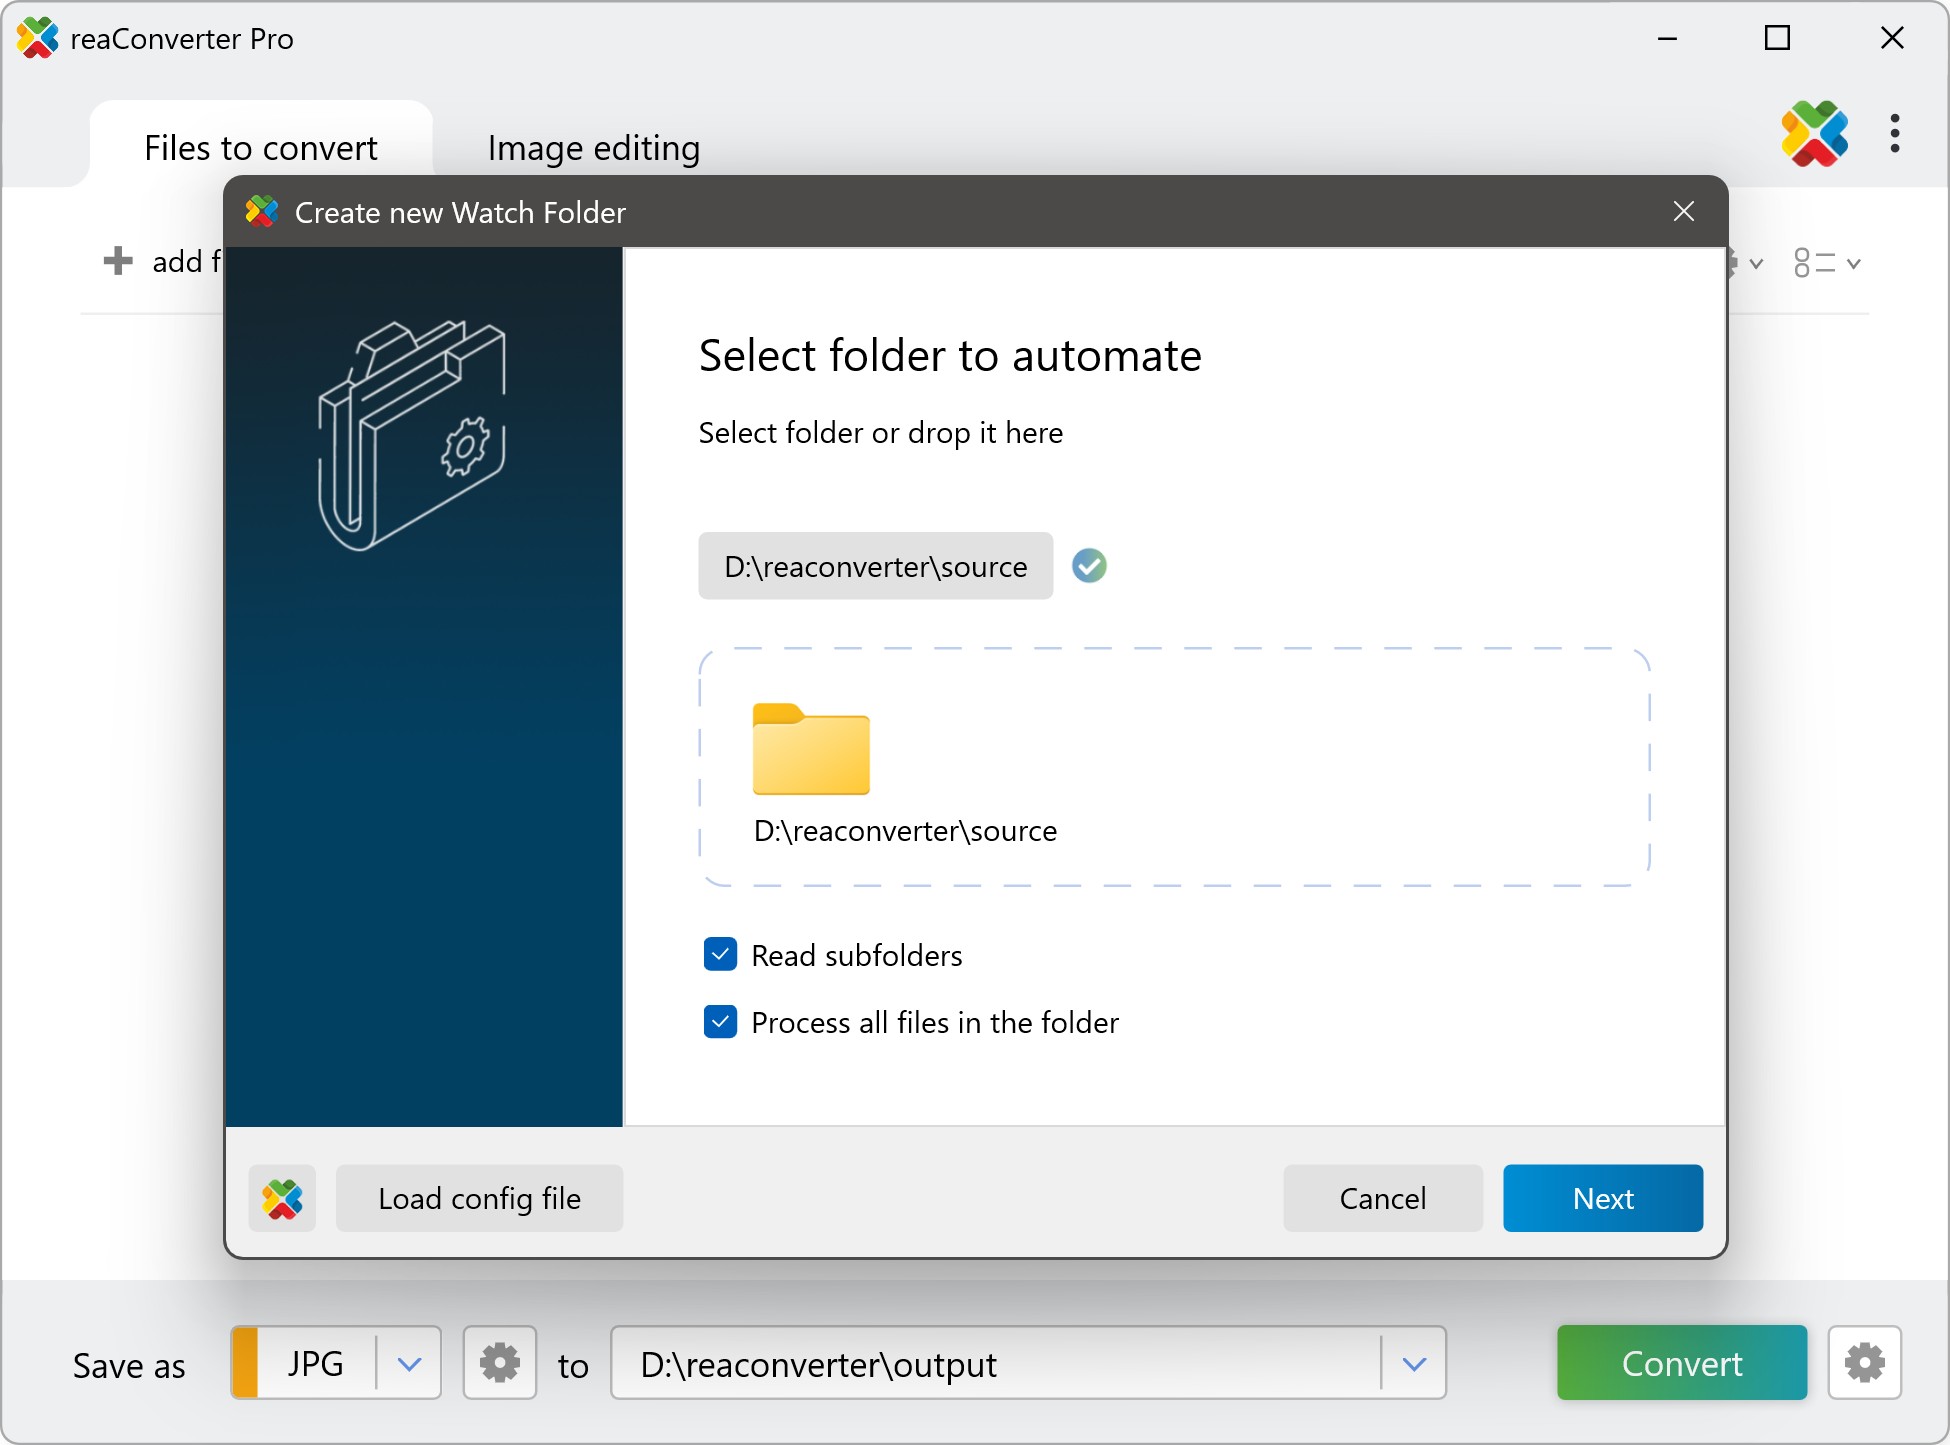
Step 1: Select Folder to Automate
Choose the folder that reaConverter will monitor for new files. You can drag and drop a folder or browse to select it.
Options
Read subfolders — Monitor all subfolders within the selected folder. Useful for complex directory structures.
Process all files without filtering — Enable to convert every file in the folder. Disable to define file masks and exclusions in the next step.
File Masks (Advanced)
Filter which files to process using file masks. You can use simple wildcards or regular expressions for precise control.
Examples:
*.tif — process all TIFF files
IMG_*.jpg — process JPG files starting with "IMG_"
/[A-Z]{4} \d{4}_Rev\.dxf/ — regex pattern for specific DXF naming convention
Tip: Click the reaConverter icon button in the bottom-left corner of the wizard to load your current conversion settings automatically.
Step 2: Select Folder to Save Results
Choose where converted files will be saved. Three options are available:
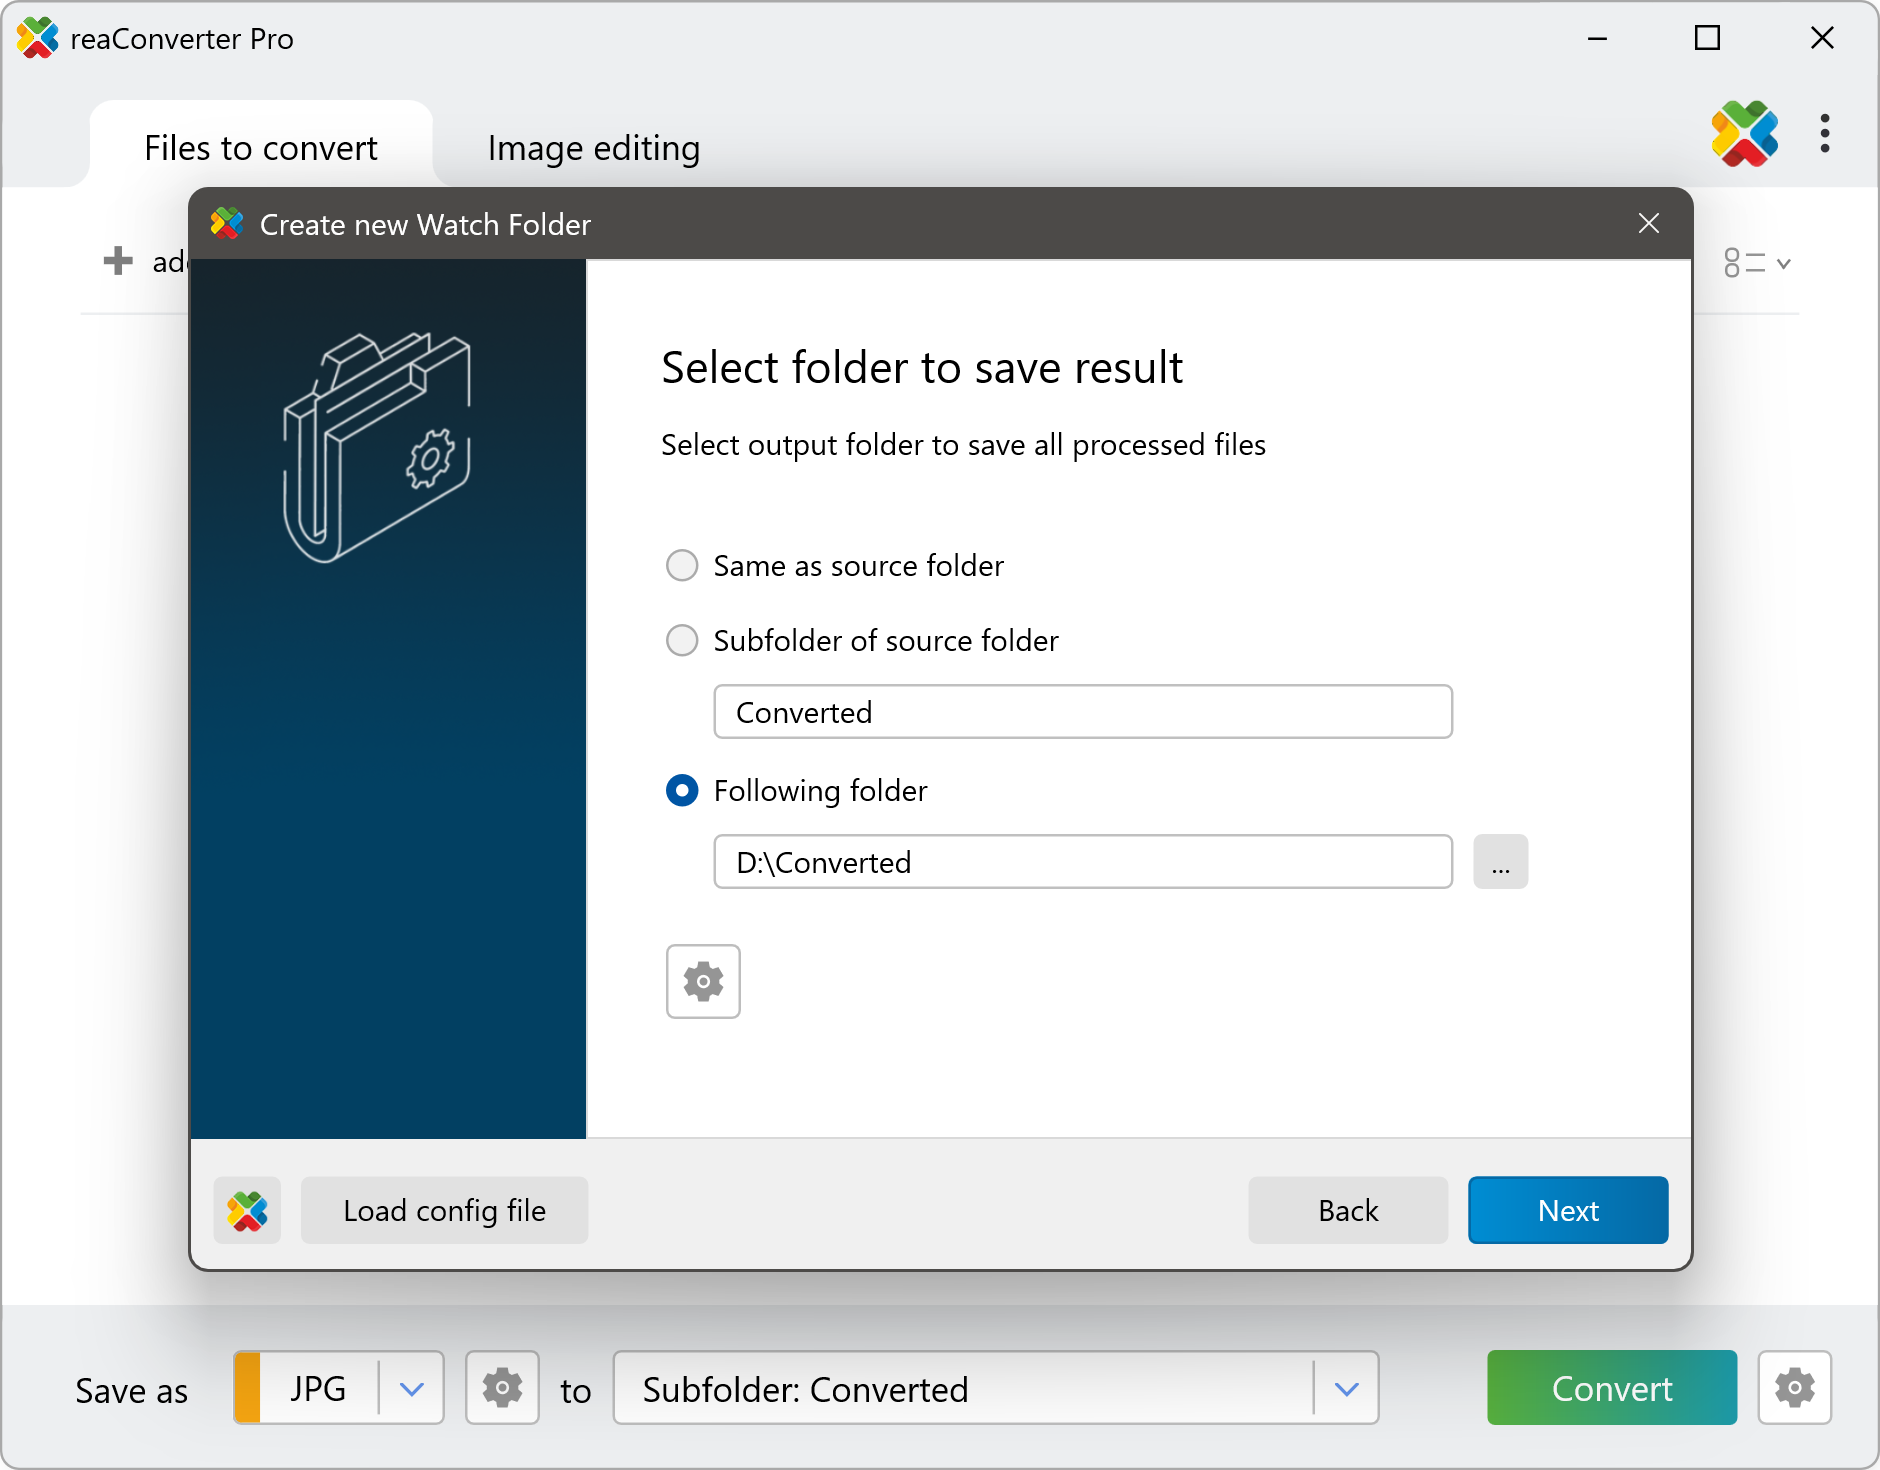
Same as source folder — Save converted files in the same folder as the originals. reaConverter automatically excludes newly created files from processing to prevent loops.
Subfolder of source folder — Create a subfolder (e.g., "Converted") inside each source folder. Ideal when using "Read subfolders" to maintain directory structure.
Following folder — Save all converted files to a specific folder of your choice.
Step 3: Saving Settings
Configure the output format and optional image editing actions.
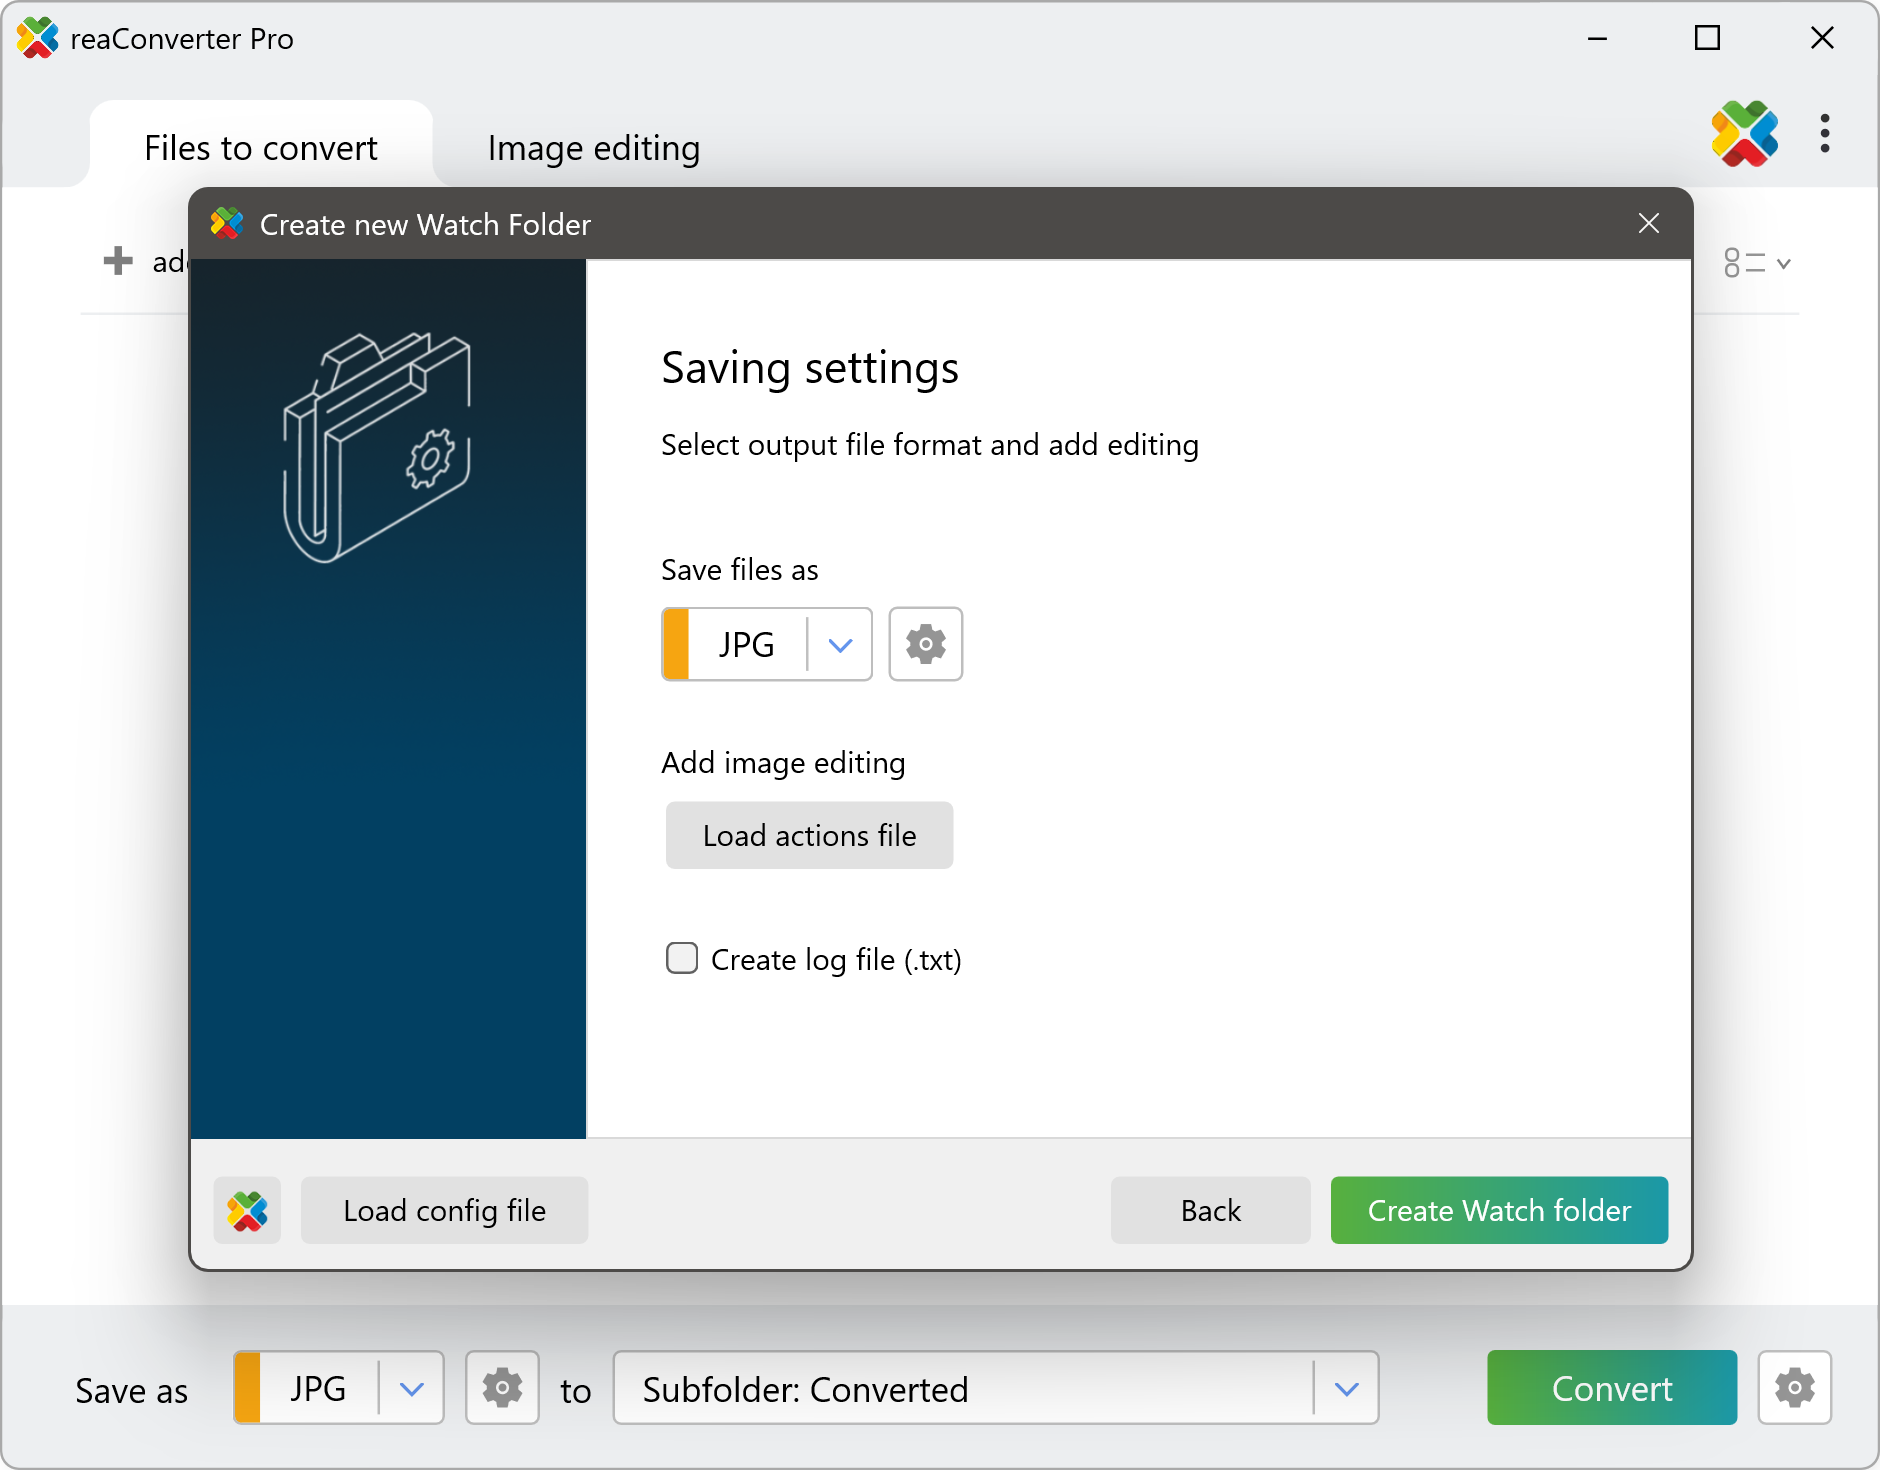
Save files as — Select the output format (JPG, PNG, PDF, TIFF, and 800+ more). Click the gear icon to adjust format-specific settings like quality and compression.
Load actions file — Apply image editing operations (resize, crop, watermark, rotate, etc.) by loading a previously saved .act file.
Create log file — Generate a text log of all conversions for tracking and troubleshooting.
Click Create Watch folder to complete the setup. Your Watch Folder is now active and will automatically process files as they are added.
Advanced: Using Configuration Files
For complex workflows or replicating settings across multiple Watch Folders.
Configuration File.cfg
Stores conversion settings: output format, destination folder, file naming rules, and post-conversion actions.
Menu → Save configuration as
Action File.act
Stores image editing operations: resize, crop, watermark, rotate, adjust colors, and more.
Image editing tab → Save actions to file as
Tips for Effective Use
Batch processing existing files — Enable "Process all files in the folder" to convert files that are already in the folder when you create the Watch Folder.
Organize with subfolders — Use "Subfolder of source folder" output option combined with "Read subfolders" to maintain your directory structure while keeping originals separate from converted files.
File management automation — Configure reaConverter to automatically move or delete original files after conversion. Set this up in Menu → Saving Settings → File options before creating the Watch Folder, or include it in a .cfg file.
Multiple Watch Folders — Create different Watch Folders for different conversion tasks. For example, one folder for resizing images, another for PDF conversion, and another for watermarking.
You are welcome to contact our technical support when you have any questions about reaConverter.
Watch Folders on your PC
In our video tutorial we will illustrate how to automatically resize and convert images from JPG to WebP format using reaConverter's Watch Folders feature.